Foundation Perfection: A Step-by-Step Application Guide
Achieving a flawless, natural-looking foundation is a cornerstone of many makeup routines. However, the quest for a perfect complexion can be riddled with pitfalls. This guide provides a comprehensive, step-by-step approach to foundation application, covering everything from skin preparation to setting techniques, ensuring a complexion that radiates health and evenness.
1. Skin Preparation: The Foundation of Foundation
The state of your skin significantly impacts how foundation sits and performs. Neglecting skin preparation is akin to building a house on shaky ground.
- Cleansing: Begin with a thorough cleanse. Use a gentle cleanser suited to your skin type. If you’re particularly oily, a foaming cleanser might be beneficial. For dry or sensitive skin, opt for a cream or oil-based cleanser. Remove all traces of makeup, dirt, and oil.
- Exfoliation (1-2 times per week): Exfoliation removes dead skin cells, creating a smooth canvas for foundation. Choose a physical exfoliant (scrub) or a chemical exfoliant (AHAs/BHAs). Be mindful of over-exfoliating, which can lead to irritation.
- Toning (Optional): Toner helps balance the skin’s pH level after cleansing. Look for alcohol-free toners to avoid stripping the skin of its natural oils. Hydrating toners with ingredients like hyaluronic acid can add an extra layer of moisture.
- Serum (Optional): Serums address specific skin concerns like hydration, brightness, or anti-aging. Apply your serum after toning and before moisturizing. Allow the serum to fully absorb into the skin before proceeding.
- Moisturizing: Hydrated skin is crucial for even foundation application. Choose a moisturizer appropriate for your skin type. Lightweight moisturizers work well for oily skin, while richer creams are better for dry skin. Allow the moisturizer to fully absorb before the next step.
- Sunscreen (Daytime Only): Protect your skin from harmful UV rays with a broad-spectrum sunscreen with an SPF of 30 or higher. This is a non-negotiable step in your skincare routine, especially before applying makeup.
2. Choosing the Right Foundation
Selecting the correct foundation formula and shade is paramount to achieving a natural look.
- Understand Your Skin Type: Foundation interacts differently with various skin types.
- Oily Skin: Opt for oil-free, matte, or long-wearing formulas. Powder foundations or foundations designed for oily skin are ideal. Look for ingredients like silica or clay, which help absorb excess oil.
- Dry Skin: Choose hydrating, dewy, or moisturizing formulas. Cream or liquid foundations are often better suited. Avoid matte formulas, which can accentuate dryness and fine lines.
- Combination Skin: Experiment with different formulas to find what works best. You might prefer a matte foundation in the T-zone and a hydrating foundation on the cheeks.
- Sensitive Skin: Look for hypoallergenic, fragrance-free, and non-comedogenic formulas. Mineral foundations are often a good choice.
- Identify Your Coverage Needs: Foundation provides varying levels of coverage.
- Sheer Coverage: Provides a natural, barely-there look. Ideal for those with minimal imperfections.
- Light Coverage: Evens out skin tone and provides a subtle blurring effect.
- Medium Coverage: Covers blemishes, redness, and unevenness without feeling heavy.
- Full Coverage: Provides maximum coverage for significant imperfections or discoloration.
- Match Your Shade: Shade matching is the most crucial aspect.
- Test in Natural Light: Apply a small amount of foundation to your jawline and blend it down. The shade that disappears into your skin is the closest match.
- Consider Undertones: Undertones are the subtle hues beneath the skin’s surface.
- Warm Undertones: Skin appears golden, yellow, or peachy. Look for foundations with yellow or golden undertones.
- Cool Undertones: Skin appears pink, red, or blue. Look for foundations with pink or blue undertones.
- Neutral Undertones: Skin has a balance of warm and cool tones. Look for foundations with neutral undertones.
- Don’t Match to Your Hand: Your hand is often a different shade than your face.
3. Applying Primer (Optional but Recommended)
Primer creates a smooth canvas, improves foundation longevity, and addresses specific skin concerns.
- Choose the Right Primer:
- For Oily Skin: Use a mattifying primer to control shine and minimize pores.
- For Dry Skin: Use a hydrating primer to add moisture and prevent foundation from clinging to dry patches.
- For Large Pores: Use a pore-filling primer to create a smooth surface.
- For Redness: Use a color-correcting primer with a green tint to neutralize redness.
- Apply a Thin Layer: Use your fingertips or a brush to apply a thin, even layer of primer to your entire face. Focus on areas where you experience specific concerns, such as the T-zone or areas with large pores.
- Allow Primer to Set: Let the primer sit on your skin for a few minutes before applying foundation. This allows it to fully absorb and create a proper base.
4. Application Techniques: Brushes, Sponges, and Fingers
The application method significantly impacts the finish of your foundation.
- Brushes:
- Flat Foundation Brush: Provides full coverage and a smooth finish. Ideal for liquid or cream foundations.
- Buffing Brush (Stippling Brush): Creates a natural, airbrushed finish. Best for building coverage gradually.
- Kabuki Brush: Provides medium to full coverage and is excellent for blending powder foundations.
- Sponges (Dampened):
- Beauty Sponge (Egg-Shaped): Creates a dewy, natural finish with sheer to medium coverage. The dampness prevents the sponge from absorbing too much product.
- Wedge Sponge: Provides full coverage and is useful for reaching small areas.
- Fingers:
- Provides sheer to light coverage and a natural finish. The warmth of your fingers can help blend the foundation seamlessly into the skin.
5. Foundation Application: The Step-by-Step Process
- Dispense a Small Amount of Product: Start with a small amount of foundation on the back of your hand or a palette. You can always add more, but it’s harder to remove excess product.
- Apply in Sections: Dot the foundation onto your forehead, cheeks, nose, and chin.
- Blend Outward: Using your chosen application method, blend the foundation outward from the center of your face, paying attention to your hairline and jawline.
- Build Coverage Gradually: Add more foundation to areas that need more coverage, such as blemishes or redness.
- Blend Thoroughly: Ensure there are no harsh lines or streaks. Pay attention to the area around your nose, eyes, and mouth.
- Check in Different Lighting: Examine your makeup in natural light to ensure the foundation is blended seamlessly and the shade matches your skin tone.
6. Concealing (Optional)
Concealer addresses specific imperfections that foundation alone cannot cover.
- Apply Concealer After Foundation: Applying concealer after foundation allows you to use less product and prevents it from being wiped away during foundation application.
- Choose the Right Concealer:
- For Blemishes: Use a concealer that matches your skin tone and has a thick consistency.
- For Under-Eye Circles: Use a concealer that is one to two shades lighter than your skin tone and has a creamy consistency.
- Apply Concealer Strategically: Apply concealer only to the areas that need it. Use a small brush or your fingertip to dab the concealer onto the imperfection and blend it seamlessly into the surrounding skin.
7. Setting the Foundation: Powder Power
Setting powder locks the foundation in place, controls shine, and extends its wear.
- Choose the Right Powder:
- Loose Powder: Provides a lightweight, natural finish.
- Pressed Powder: Provides more coverage and is easier to carry.
- Translucent Powder: Does not add color and is ideal for setting all skin tones.
- Tinted Powder: Adds a touch of color and can provide extra coverage.
- Apply Powder with a Brush or Sponge:
- Brush: Use a large, fluffy brush to lightly dust powder over your entire face.
- Sponge: Use a dampened beauty sponge to press powder into the skin, especially in areas that tend to get oily. This technique is known as “baking” and provides a long-lasting, matte finish.
- Dust Off Excess Powder: Use a clean brush to dust off any excess powder.
8. Finishing Touches
Adding finishing touches can enhance your foundation and create a polished look.
- Setting Spray: Setting spray helps to blend all the layers of makeup together and create a natural, long-lasting finish.
- Blush, Bronzer, and Highlight: Add dimension and color to your face with blush, bronzer, and highlight.
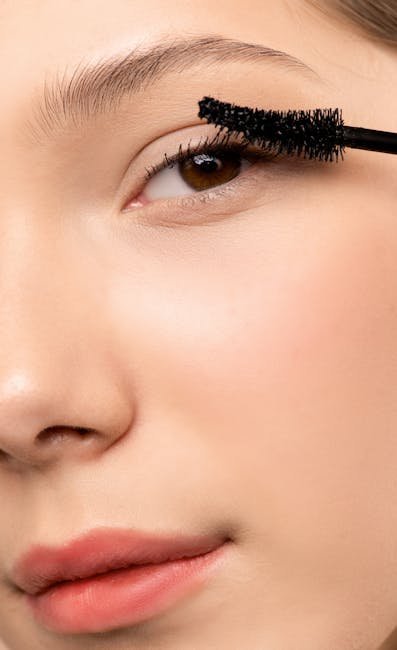
- Mascara and Lipstick: Complete your look with mascara and lipstick.
By following these steps, you can achieve a flawless, natural-looking foundation that enhances your complexion and boosts your confidence. Remember that practice makes perfect, so don’t be afraid to experiment and find what works best for your skin and preferences.